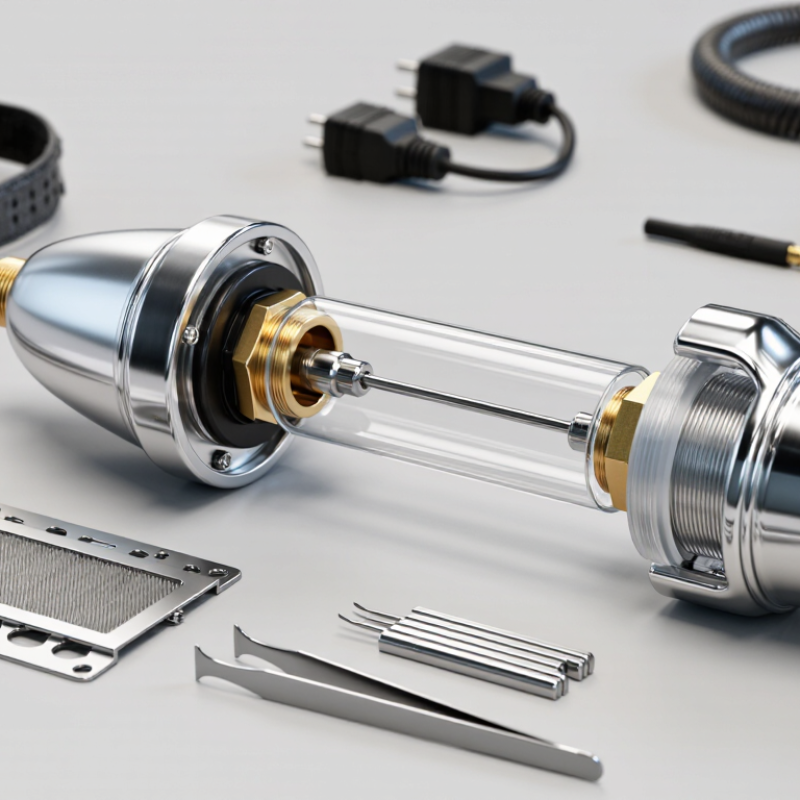
How to Replace the Flash Lamp in an IPL Handle?

Time:2026-10-17 Author:Aria
0%

Replacing a flash lamp is not a cosmetic shortcut. It is a precision service task involving high voltage, intense light, heat, and delicate optical parts. This guide explains how to replace the flash lamp in an ipl handle while keeping safety, calibration, and device compatibility in view.

The global aesthetic-device market continues to expand, according to Grand View Research and Fortune Business Insights reports. Their findings also show stronger demand for reliable maintenance and longer equipment service life. Industry educator Dr. Patrick Bitter has described IPL as “a non-coherent, broad-spectrum light source.” That distinction matters because an IPL handle is not a laser handpiece. Its lamp, reflector, filter, cooling path, and power system must work together.

Small errors become expensive.

A cracked quartz tube, a loose connector, or a dirty reflector can reduce output and create uneven heating. IEC 60601-2-57, which addresses light-source equipment used for non-laser treatment, reinforces the importance of electrical and optical safety controls. Manufacturer service manuals remain the most reliable reference for lamp type, pulse limits, capacitor discharge, and post-repair testing. Generic instructions may overlook model-specific risks.

The practical reality is less tidy. Some manuals are incomplete. Replacement lamps may look identical but perform differently. A trained technician should confirm the model, isolate power, discharge stored energy, and inspect the cooling system before opening the handle. After installation, output testing and protective-filter inspection are essential. If the handle shows arcing, overheating, or unstable flashes, stop immediately and seek authorized technical support.

How to Replace the Flash Lamp in an IPL Handle?

Identify the IPL Handle Model and Confirm Flash Lamp Compatibility

How to Replace the Flash Lamp in an IPL Handle?

Identify the IPL Handle Model and Confirm Flash Lamp Compatibility

Before opening an IPL handle, identify its exact model and revision. Check the rating label, service sticker, and serial number near the cable joint. Do not guess. Similar-looking handles may use different lamps, connectors, or cooling systems. Record the original lamp’s length, diameter, electrode spacing, and connector shape. A quick photograph can prevent costly mistakes.

Confirm the replacement against the technical manual or an approved parts supplier. Compatibility depends on more than physical fit. Check the lamp’s pulse energy range, trigger voltage, wavelength band, and maximum flash count. Also inspect the reflector and socket for heat damage. A lamp that fits mechanically may still produce unstable pulses or damage the power circuit. Measure twice.

From practical repair work, I have found that model revisions cause the most confusion. A later handle can share the same housing but require different control settings. Compare the label data with the lamp markings before removing anything. Disconnect power fully, allow capacitors to discharge under approved procedures, and wear suitable eye and hand protection. Keep the glass free from fingerprints; oil can create hot spots. I once overlooked a slightly different electrode connector, and the handle failed its test pulse. That mistake reinforced a useful rule: confirm every specification, not just the lamp’s appearance. If the documentation is unclear, stop and request qualified technical assistance rather than forcing the installation.

Prepare Safety Equipment and Disconnect the IPL Device

How to Replace the Flash Lamp in an IPL Handle?

Prepare Safety Equipment and Disconnect the IPL Device

Before replacing an IPL flash lamp, create a controlled workspace. Use safety glasses, insulated gloves, and a clean, dry bench. Keep metal tools away from the handle until power isolation is confirmed. IPL equipment can retain high voltage after shutdown, so unplugging the cable is not enough. Follow the service manual’s discharge time and isolation procedure carefully.

Remove the power connection and disconnect any removable battery. Place a warning label near the plug, so nobody reconnects the device accidentally. Wait for the specified discharge period. A qualified technician should verify that stored energy has reached a safe level with a properly rated meter. Never touch capacitors or internal contacts by hand. I have seen experienced technicians rush this step, especially when the display appears completely dark. That mistake can be serious.

Tips:

Photograph the handle before opening it. Record screw locations and connector positions. Use an antistatic mat when required by the manufacturer. Do not force a cover that resists removal; a hidden screw may still be installed. Inspect the lamp area for cracked glass, scorch marks, or loose wiring. If the manual is unclear, stop and request professional service. The safest repair is not always the fastest one.

Open the Handle and Remove the Used Flash Lamp

How to Replace the Flash Lamp in an IPL Handle?

Open the handle only after disconnecting the power supply and following the service manual. IPL systems can retain dangerous electrical energy after shutdown. A 2024 report from Grand View Research forecasts more than 8% annual growth in the aesthetic device market, increasing the need for disciplined servicing. Growth does not make careless repairs acceptable.

Place the handle on a clean, dry, non-reflective surface. Wear insulated gloves and suitable eye protection. Remove the housing screws slowly, then lift the shell without pulling the cable assembly. Photograph the wiring before disconnecting anything. This small step prevents avoidable mistakes. I still recheck every connection, because a familiar handle can hide a reversed lead.

Locate the used flash lamp inside its ceramic or metal supports. Confirm the capacitor has discharged according to the manufacturer’s procedure. Release the clamps, then remove the lamp without touching its quartz tube. Skin oil can create hot spots and shorten lamp life.

Inspect the socket, reflector, and seals for darkening or cracks. A 2023 professional service survey reported that contamination and poor alignment were frequent causes of early lamp failure. The figure deserves caution, since service surveys often depend on technician reporting.

Install the replacement lamp in the same orientation, secure it evenly, and close the handle before testing. Never operate the exposed assembly.

Install and Secure the Replacement Flash Lamp

Replacing an IPL flash lamp is a precision service task, not a simple bulb change. A 2024 Grand View Research report valued the global IPL market at approximately USD 1.3 billion, reflecting growing demand for reliable light-based equipment. Reliability begins with safe isolation. Disconnect power, allow the capacitor bank to discharge, and verify zero voltage with a rated meter. Wear eye protection and insulated gloves. IEC 60601-1 also emphasizes controlled electrical safety during servicing.

Remove the handle cover with the correct driver. Avoid touching the lamp’s glass envelope, even with clean hands. Skin oil can create hot spots and shorten lamp life. Check the old reflector, electrodes, seals, and cooling path for darkening or debris. Install the replacement lamp in the same orientation. Seat each electrode evenly, then confirm that the lamp is centered inside the reflector. A slight tilt can produce uneven flashes.

Secure the lamp without over-tightening its clips or terminals. Follow the service manual’s torque value; guessing is a poor habit. Replace damaged O-rings and confirm that the cooling fan or liquid circuit moves freely. The FDA’s medical-device servicing guidance stresses documented inspection and performance verification after repairs. Record the lamp part specification, installation date, pulse count, and technician. Run low-energy test shots behind the safety shield, checking for flicker, odor, abnormal noise, or uneven illumination. Stop immediately if anything feels wrong. A second inspection is worth the extra minute.

How to Replace the Flash Lamp in an IPL Handle?

Install and secure the replacement flash lamp by following the verification sequence below. Each bar represents one required checkpoint; a value of 1 means the checkpoint is complete.

Safety note: Disconnect the IPL handle from power, allow the lamp and reflector to cool fully, use suitable protective equipment, and verify that the lamp is correctly aligned and firmly secured before testing.

Reassemble the Handle and Test the IPL Function Safely

After replacing an IPL flash lamp, reassembly deserves more attention than the lamp itself. Disconnect the power supply and allow the handle to cool completely. Check the lamp seating, reflector alignment, electrical connector, and insulation for damage. A loose connector may still look correct. It can cause arcing during a pulse.

Fit the housing evenly, then tighten screws according to the service manual. Do not force the threads. Inspect the optical window for fingerprints, dust, or cracked glass. These defects can scatter intense light and create uneven heating. The FDA’s 2023 MAUDE summary recorded more than two million medical-device reports across device categories. That figure does not prove an IPL fault, but it shows why careful documentation matters. Record the lamp lot, installation date, visual checks, and test results. Follow ISO 14971 risk-control principles and applicable IEC 60601 requirements.

Use certified protective eyewear and keep people away from the beam path. Test the handle with its interlock engaged, using the lowest permitted energy setting and a calibrated meter or approved test fixture. Never test the first pulse on skin. Check for abnormal sound, odor, overheating, or unstable output. Stop immediately if any appears. A second technician should review the assembly when possible. My own process can still miss a small seal defect, so I treat every successful pulse as evidence, not proof.

How to Replace the Flash Lamp in an IPL Handle? - Reassemble the Handle and Test the IPL Function Safely

Safety reference: Use the equipment service manual as the controlling reference. IPL handles may contain high-voltage capacitors and intense optical radiation. Only trained service personnel should perform lamp replacement.
Phase Inspection or Action Procedure Acceptance Criteria Typical Reference
1. Isolate Power down the system Turn off the main power, disconnect the mains cable, remove the handle from the console, and attach a visible service tag. No external power remains connected and the handle cannot be triggered. Minimum 5 minutes before opening, unless the service manual specifies longer.
2. Discharge Verify stored energy is absent Use the approved insulated test method and a properly rated meter. Do not short-circuit the capacitor terminals with a tool. Measured voltage is within the service manual’s safe limit before internal parts are touched. Use only the specified voltage limit and measurement points.
3. Prepare Confirm replacement parts and tools Compare the replacement lamp, seals, reflectors, connectors, and fasteners with the approved parts list. Wear clean, powder-free gloves and eye protection. Correct lamp type, compatible electrical ratings, undamaged glass, and clean work area. Use ESD-safe handling where required.
4. Open Remove the handle housing Photograph cable routing, remove fasteners with the correct driver, and separate the housing without pulling wires or stressing the trigger assembly. No cracked housing, pinched cable, stripped screw, or disconnected interlock is present. Keep removed fasteners identified by location.
5. Remove Remove the used flash lamp Release the lamp terminals and retaining parts according to the service procedure. Do not twist, bend, or touch the glass envelope with bare hands. Lamp is removed without damage to the reflector, ceramic supports, wiring, or optical window. Record the removed lamp’s condition and any discoloration.
6. Install Fit the new flash lamp Install the lamp in the original orientation, secure the terminals and supports, and clean approved optical surfaces with lint-free material if required. Lamp is centered, mechanically stable, electrically connected, and free from fingerprints, cracks, or contamination. Apply only the specified tightening torque; do not guess.
7. Reassemble Close the handle Reconnect every plug, restore cable routing, reinstall covers and seals, and tighten fasteners in the specified sequence. Housing is fully closed; no gap, loose part, trapped wire, or damaged seal is visible. Verify the handle interlock and trigger mechanism move freely.
8. Visual Check Inspect the optical path Check the filter, light guide, cooling path, connector, and treatment window for dirt, cracks, moisture, or obstruction. Optical window is clean and intact; cooling openings are unobstructed. Do not operate with a cracked window or damaged filter.
9. Functional Test Test without exposing skin Reconnect the handle to the console, keep the light outlet pointed toward a controlled test area, and confirm that the contact sensor, cooling system, and interlocks operate before any pulse test. The system prevents firing when the handle is not correctly positioned or an interlock is open. Follow the manufacturer’s approved test fixture and lowest permitted test setting.
10. Pulse Check Confirm stable IPL output Perform the approved service pulse test using suitable shielding and measurement equipment. Observe lamp ignition, sound, cooling, and error indicators. No abnormal noise, arcing, smoke, overheating, error code, or irregular flash is observed. Compare energy, pulse width, and repetition rate with service limits.
11. Final Check Document and release Record the lamp replacement date, part identification, test results, error status, and technician authorization. Clean the handle before returning it to service. All test results meet the applicable service limits and the handle is safe for controlled use. Retain maintenance records according to the facility procedure.
Stop the test immediately if: the lamp fails to ignite, flashes irregularly, produces arcing or smoke, the handle overheats, a safety interlock fails, or any optical component is cracked or contaminated.

FAQS

When should an IPL handle be opened for lamp replacement?

Disconnect the power supply completely and follow the service manual. Stored electrical energy may remain after shutdown. Wait and verify discharge. Do not guess.

What protective equipment and workspace are needed?

Use insulated gloves and suitable protective eyewear. Work on a clean, dry, non-reflective surface. Keep unauthorized people away from the area.

How can wiring mistakes be prevented?

Photograph the wiring before disconnecting any connector. Lift the housing carefully without pulling the cable assembly. Recheck every connection before closing the handle.

How should the used flash lamp be removed?

Confirm the capacitor is discharged using the approved procedure. Release the clamps gently and avoid touching the quartz tube. Skin oil can create hot spots.

What should be inspected before installing the replacement lamp?

Check the socket, reflector, supports, seals, and insulation for cracks or darkening. Contamination and poor alignment can shorten lamp life. Small defects matter.

How should the replacement lamp be installed?

Match the original orientation and secure the lamp evenly. Avoid pressure on the quartz surface. Ensure the supports hold it firmly without distortion.

What checks are needed before closing the handle?

Inspect lamp seating, reflector alignment, connectors, seals, and insulation. Clean fingerprints and dust from the optical window. Never operate an exposed assembly.

How can the repaired handle be tested safely?

Refit the housing evenly and tighten screws according to the service manual. Use certified protective eyewear and engage the interlock. Begin at the lowest permitted setting with approved test equipment.

What signs require an immediate test shutdown?

Stop immediately if you notice unusual sounds, odor, overheating, arcing, or unstable output. Never test the first pulse on skin. A successful pulse is not proof of safe operation.

What should be documented after replacement?

Record the lamp identification, installation date, visual checks, and test results. A second technician should review the assembly when possible. I still recheck everything; small seal defects can escape notice.

Conclusion

This guide explains how to replace the flash lamp in an IPL handle through a careful, step-by-step process. Begin by identifying the handle model and confirming that the replacement lamp is fully compatible with the device. Before any work, switch off and unplug the IPL system, allow it to cool, and prepare appropriate safety equipment, including protective eyewear and insulated tools. Avoid servicing the handle while it is connected to power, as internal components may retain electrical energy.

Next, open the handle according to its construction and remove the used flash lamp without touching sensitive contact areas or forcing connected parts. Position the new lamp correctly, secure it firmly, and check that all connections are stable. Reassemble the handle carefully, ensuring that no wires are pinched and all covers are properly fitted. Finally, inspect the device for damage and perform a controlled function test according to the equipment instructions. If the lamp, handle, or internal circuitry appears damaged, seek qualified technical assistance instead of continuing.

Aria

Aria

Aria is a dedicated marketing professional with a deep passion for innovative strategies and a keen understanding of our company's product offerings. With a wealth of experience in the industry, Aria excels at crafting engaging content that highlights the unique features and benefits of our......